n8n
In the new boilerplate, you can create AI Agents with a Low-Code solution using n8n API
If you want to use n8n API - you need to buy any paid plan, as there is no possibility to work with API in free plan
Environment variables
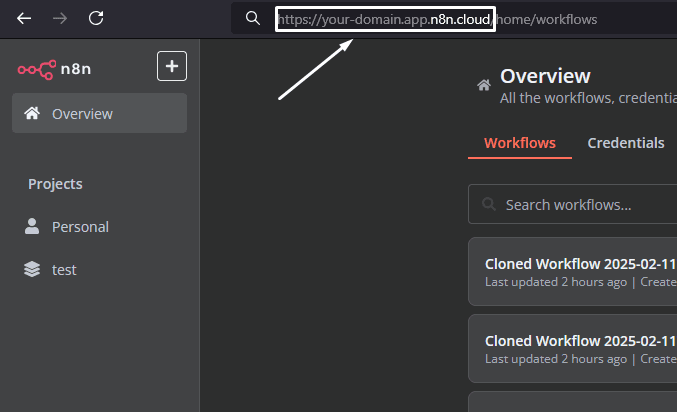
1. Log in to your n8n account and create a new workflow
2. Copy your workflow path and paste in .env
.env
N8N_API_URL=https://your-domain.app.n8n.cloud/api/v1 N8N_WEBHOOK_URL=https://your-domain.app.n8n.cloud/webhook
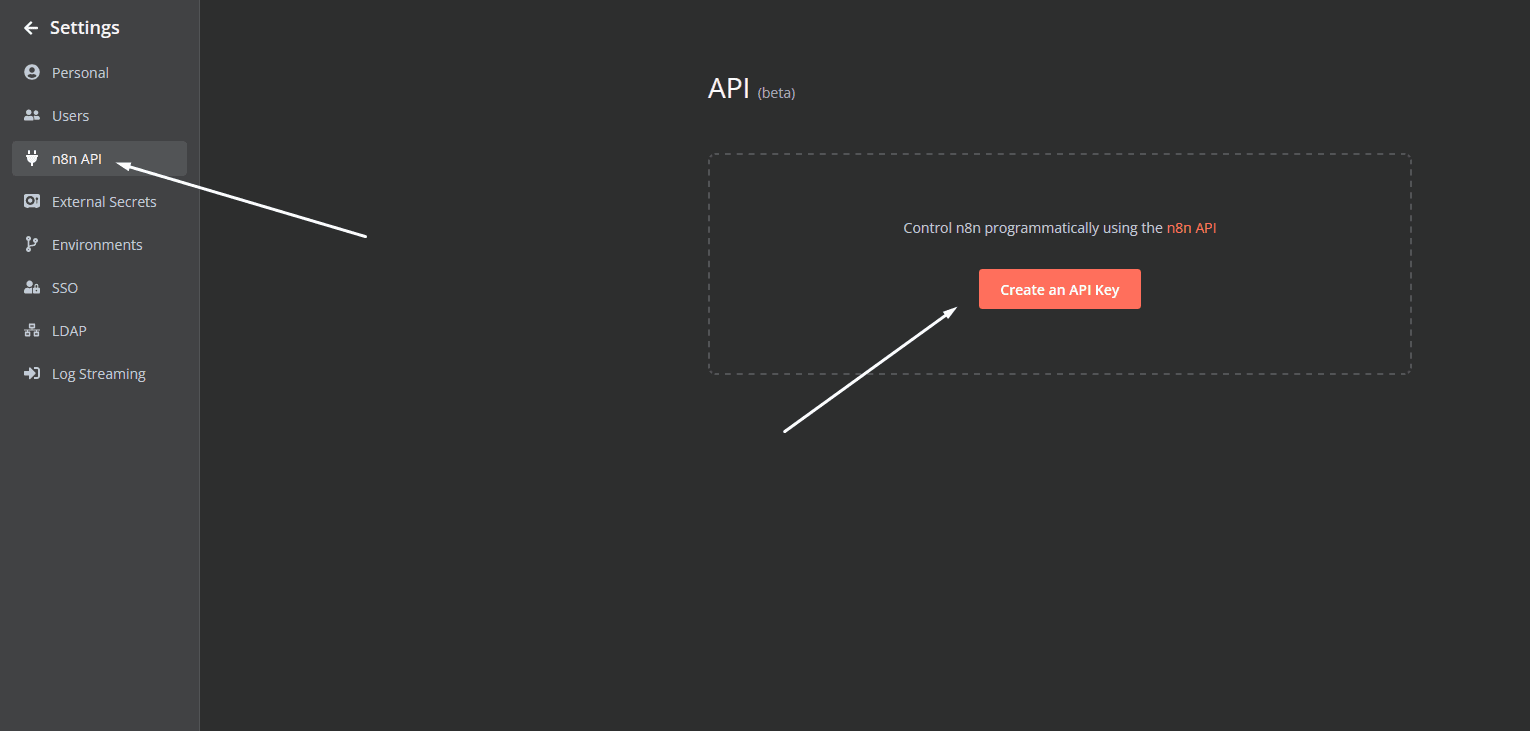
4. Create your API KEY here and paste in .env
To use n8n API - you need to buy any paid plan, as there is no possibility to work with API in free plan
.env
N8N_API_KEY=
Scenario templates
1. Create a new workflow in n8n
If you want to communicate with your workflow via HTTP requests, your workflow must start and end with the Webhook module (gateway-webhook)
2. Add your workflow data to the workflows/page.tsx availableScenarios like this:
scenarios/page.tsx
{ id: 'yourWorkflowId', image: '/workflows/n8n.png', name: 'yourWorkflowName', description: 'yourWorkflowDescription', fields: ['yourWorkflowFields'], route: '/api/workflows/yourWorkflowName', },
3. Create a new route in app/api/workflows. You must specify each connection and the initial webhook, if any. Like this:
• Credentials are created like this:
app/api/scenarios/yourScenarioName.ts
// Creating OpenAI credentials const credentialsData: N8nCredentials = { name: 'OpenAI date', type: 'openAiApi', data: { apiKey: apiKey }, } const credentialsResponse = await axios.post( 'N8N_BASE_URL/credentials', credentialsData, { headers } ) const credentialsId = credentialsResponse.data.id if (!credentialsId) { throw new Error('Failed to create credentials') }
4. GET a blueprint of your workflow from /workflows/WORKFLOW_ID
app/api/scenarios/yourScenarioName.ts
// Getting the source workflow const workflowResponse = await axios.get( 'N8N_BASE_URL/workflows/id', { headers } ) const workflow = workflowResponse.data const webhookPath = date.replace(/[^a-zA-Z0-9]/g, '')
5. Update the nodes configuration
app/api/scenarios/yourScenarioName.ts
// 4. Updating nodes configuration const updatedNodes: WorkflowNode[] = workflow.nodes.map( (node: WorkflowNode) => { if (node.type === 'n8n-nodes-base.webhook') { return { ...node, parameters: { ...node.parameters, path: webhookPath, }, } } if (node.type === 'n8n-nodes-base.openAi') { return { ...node, credentials: { openAiApi: credentialsId, }, parameters: { ...node.parameters, assistantId: assistantId, }, } } return node } )
6. Create new workflow using new blueprint and synchronize it with Database
Interaction with functionality
If your trigger module is a getaway-webhook, you get a link to which you can send requests. The boilerplate already has a trial version of chat with scenario /chat/projectID/page.tsx